Showing posts with label DIY. Show all posts

Thursday, July 16, 2015

DIY GAME OF THRONES SHIRT

Hello guys! I apologize for not posting for a long while; between graduation, graduation parties, and traveling, I haven't had a whole lot of extra time. However, I have found the time to watch all five seasons of Game of Thrones, basically consecutively, which led to a lot of crying during the Red Wedding and the season 5 finale (these crows ain't loyal). I also found myself obsessing over GoT merchandise, which is often etsy material (aka can cost a lot because homemade). 

I found this shirt: 


which flawlessly conveys the fact that you are a hardcore GoT fan and that you support the khaleesi as the winner of the game of thrones. I really like this shirt because it's simple, but can be worn many ways. So let's get into it! 

WHAT YOU'LL NEED: 

  • a tee shirt (a shirt from anywhere is okay. I recommend F21 or even the dollar store in a pinch) 
  • iron-on letters (you can look in craft stores for this specific type) 
  • if you don't want iron-on letters, you can try stencils and paint, but I'm terrible at paint so I'm avoiding that
STEPS: 

  1. read the iron-on letters instructions (it tells the temperature of the iron and for what length of time) 
  2. place a piece of cardboard between the front and back of the shirt 
  3. lay out the letters (you can use a ruler for equal spacing between the letters) and arrange to how you would like it. 
  4. *you can also pick different phrases like "valar morghulis" or some catchy one from Tyrion or really any phrase 
  5. follow the instructions and iron on the letters
  6. wait for the shirt to cool and then peel off the letters and enjoy! 
some ideas for how to wear this: 


I hope you guys enjoy this, especially the people who love Game of Thrones as much as I do (and yes, I have read the books too so I'm not just partial to those who watch the TV show). Valar morghulis and have fun! 

Friday, July 18, 2014

DIY FRENCH CONNECTION PINEAPPLE CROP TOP

Hello my fellow DIYers! This post starts with a TJMaxx story, as all stories should begin. As many of you may know, I frequent TJMaxx like its my job. I would actually love to have TJMaxx stalking as my job, but alas that's not how the modern world works. I was shuffling through the various racks of clothes when I saw this simple, yet fresh shirt. I love pineapples, but I also love them on clothing as well so I decided "Well, I have to get this shirt now." Except when I saw the price tag, which granted TJMaxx does have great prices, but it was $20 for a plain white shirt with some pineapples on it. I was not about to fork over 3 hours of minimum wage work for one plain shirt. So I played around and I DIYed it. Here we go!

WHAT YOU'LL NEED:

  • one plain t-shirt
  • paint of your choice
  • one stamp pad (or I'll show you how to make one with a...FLIPFLOP!)
  • exacto knife/box cutter
1. So you've got a shirt. I took mine and laid it next to an old Pacsun shirt and used the same measurements to get a nice shirt. I basically just cut the neckline a little and then I cut the bottom so the front is slightly higher than the back. 

2. Sketch out a pineapple. I doodle a lot so I had a few handy. You can also just Google "pineapple stamp" for easy results. 

3. If you've got a stamp pad, ignore this. If you don't, grab a flip flop! A cheap one from Old Navy is perfect. Just cut the heel part off (enough for your stamp) and you've got a stamp pad!

4. Trace the pineapple into the stamp pad using the knife or box cutter (which is kinda dangerous, might I add. I was so close to cutting my finger off) and then cut it out. I used heavy duty scissors for this part, but you might be able to rip it. 

5. Pour some paint out into a dish or something, dip the sponge in and then stamp! 

6. I followed the shirt and I did a row of diagonal ones and then the next row would be straight. My shirt is drying right now so I'll post a picture of it. I didn't have enough paint to do the back, but you can if you wish. I might just get some more paint and do that. 

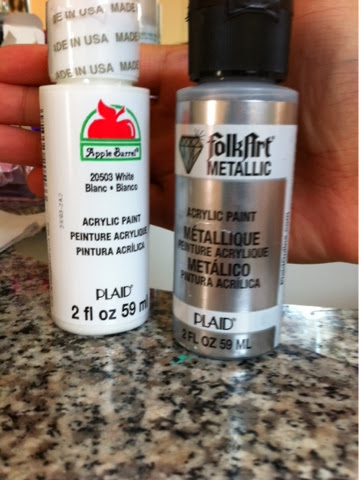
The paint I used was the Folk Art Metallic in 662 Silver Sterling, mixed with some standard white paint since I didn't have enough! And there you have it- a $20 shirt for $5. Hope you enjoy and do this yourself! 

Thursday, January 2, 2014

LOOKBOOK LIFE

Hello my fantasticals! So today I have a lookbook so you guys aren't always like "Cool, another haul." and maybe wonder what I pair it with. This is basically a haul but in outfit form... I also realized you guys don't really know much about my style besides the fact that I DIY basically everything. So let's get started! 

1. 


• fuzzy sweater- got in China 
• jeans- Levi's skinny 
• shoes- galaxy vans 

2. 


bam side view 


BeyoncĂ© moves 

 
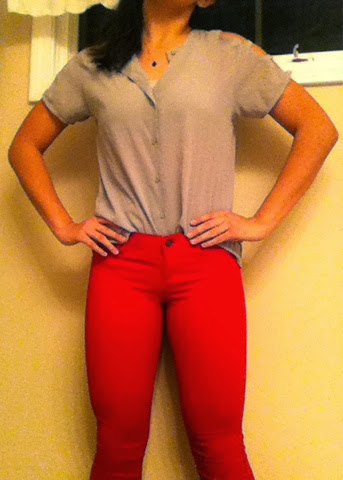
• shirt- grey cutout sleeves from a boutique
• jeans- Hollister red skinnies
• scarf- a ton of patterns with black fringe
• shoes- gray flats


3. 

 
lalalala can I be on brandy melville yet 


• dress- forever 21
• sweater- H&M 
• shoes- black lace-up heel booties 

4. 

• grey sweater dress- TJMaxx
• black long sleeve- Forever 21
• scarf- pink and blue from China 
• shoes- black lace-up booties

5. 

• striped sweater- the sweater shop
• navy knit infinity scarf- forever 21
• jeans- forever 21
• shoes- vans
sorry I don't always rock the side pony or dance but I make an exception for passion pit 

6. 
 
• baseball tee- forever 21
• jeans- forever 21
• shoes- G by Guess combat boots 

7. 
turn down for what *cue awkward but passionate dancing*

• DIY pocket tee
• black cardi- forever 21
• jeans- forever 21 
• shoes- cue the combat boots

8. 


flowers in your hairrrrrr


• sweater- a gift from my girl Catherine 
• jeans- Calvin Klein straight leg
•shoes- bam combat boots

Accessories- 

it's better to feel pain than nothing at alllllll 


MIX N MATCH 

daisy daisy daisy

can I just say I wear these earrings 24/7

arm candy: 
DIY friendship bracelets
other bracelets friends have gifted 
Alex and Ani Gemini bracelet
some surf shop anklet converted into bracelet 


necklace: the charm was a part of a necklace that I got from Chicago and I put it on a chain 


OKAY DONEEEEEE peace out

Sunday, October 13, 2013

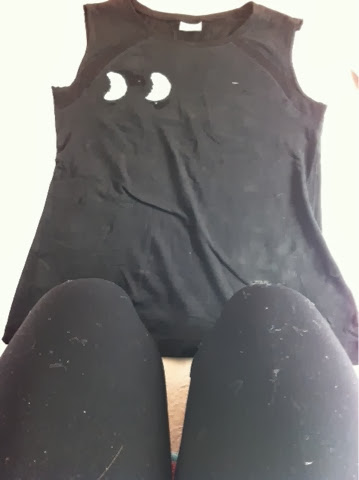
DIY BRANDY MELVILLE MOON PHASE TANK

Hello my pumpkins! Wow, that sounds weirder than I thought it would. Today we're going to DIY the Brandy Melville Moon Phase tank that is around $20.
SWERVE, who has $20 for a tank that could be made for under $8? 


You'll need:
1. Black t-shirt/tank
2. White acrylic paint
3. Metallic gray paint (optional)
4. Q-tips
5. Rubbing alcohol
6. Old magazines
7. Paintbrush, sponge
8. A cup of water
9. A piece of cardboard/thick paper


Okay here we go! 
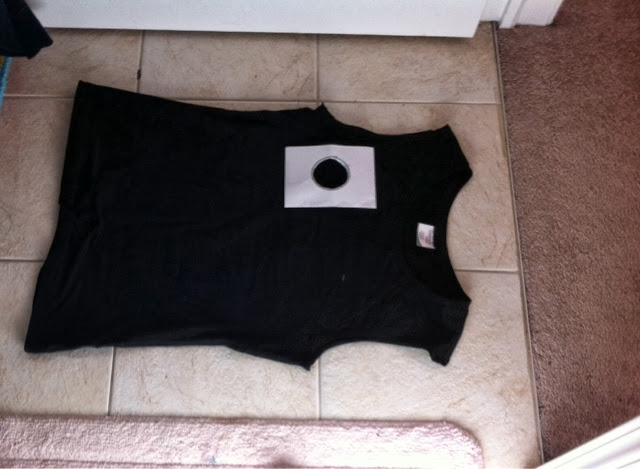
This first step is only for those with a black T-SHIRT. Cut off the sleeves to make it a tank. Next you're going to find a cup or something with a 6 CM DIAMETER and trace it onto the cardboard. Then you're going to cut it out and that's our stencil for the moons. Then this is super important: PLACE THE OLD MAGAZINES INSIDE THE TANK. Now pour out some paint and make sure you have a picture of the shirt somewhere handy to refer to. Just eyeball it to the best of your ability, it doesn't have to look 100% professional. You can use the sponge to fill the moon in and the paintbrush to smooth out the edges (that's what I tried). The gray is for making the craters on the moons, but after a while I just gave up on that. Now if you made mistakes, don't worry, all is not lost. Grab some rubbing alcohol and Q-tips, pour, and dab/scrape until the paint comes off. I also read that the Clorox wipes will work in a pinch as well, but I didn't try that out.
The painting is the fun/super long part but afterwards, try it out (or have a dance party in it) and then iron it before you throw it in the wash. After that you're done! And you just saved yourself $12 too; enough to get a lot of Jamba Juice.
Okay, until next time! See you later! 


thoughts to myself: "arghhhh what have I gotten myself into? also now my leggings are covered in lint."

"ahhhhhh i messed up the third one so much, i don't know what to do now. okay, let's google how to remove acrylic paint." 

"i got paint everywhere on this. this looks so bad that i wouldn't even let my cat wear this. ah why did i decide i would blog this? now they're gonna laugh at me and my terrible painting skills."

"BAM, rubbing alcohol is my savior. time to have my dance party and post this! holllllllla." 

Thursday, April 4, 2013

DIY: Front Tie Crop Top!

Hi my awesomes! What's going on? Missed you guys! Okay today I have a summertime DIY and this will work BEST with an oversized shirt but will work with a normally fitted shirt as well. It's the cute front tie crop top shirt and it's super easy. Let's hop to it!

WHAT YOU'LL NEED:
1. A shirt (oversized preferable, but normal is fine)
2. Scissors
3. A ruler

Okay so first you'll take your shirt and fold it sideways, hot dog style as my teacher used to say. It needs to have the sleeves on each side, like a long-wise reflection if you catch my drift.
Secondly, you need to measure out a length to cut, I used 3.5 inches from the vertical seam, but mine turned out a little towards one side.
After you've cut it, you'll be left with this little bit of fabric in the middle of your shirt and you'll cut this in half to create your ties!
After you've cut them in half, put the shirt and see if you need to make any adjustments to it.
Then I cut mine further, making it high-low because the sudden height difference bothered me. Fix up any cuts, stretch the fabric where you cut and YOU'RE DONE!
See? Wasn't that easy? It makes a really cute crop top perfect for summertime with some high-waisted cutoffs. Have fun with this! Oh and the shirt I used was from Forever 21 but I got it at Crossrhodes, which is a fashion thrift shop with outrageously good prices in Evanston, IL. If you need a good thrift shop in the Chicago region, I highly recommend Crossrhodes. That's all from me, good night! XOXO


Sunday, February 24, 2013

DIY & OOTD Skull Cutout Shirt

Hollla my motherskullers! That's probably offensive in some strange way so sorry in advance, no offense intended. So I wanted to start a DIY series of cutout shirts and this is my first. A lot of people have seen this but hey, you guys really liked the scarf and the galaxy vans so whatever!

WHAT YOU'LL NEED:
Scissors
A shirt you don't mind cutting up
A fabric marker/chalk


So I found this white shirt in my closet and it's really big and I can tell it's definitely not mine... Suspicious. So I freehanded the skull and I did in blue marker which was dumb on my part. A good tip? Use a dark shirt! Unless you can draw perfectly. I get frustrated and draw over my lines, making them worse so you guys might see some blue. But first draw, then cut! Now this seems so easy, but watch where you're cutting because it can be tricky, especially if you're cutting it really close. And once you're done cutting? Bam, finished shirt! I would wear this with a bandeau, strapless bra, cami. Whatever you like.

Okay so I actually wore this as an outfit today and let's see it. I wore a black cami under the shirt and I rolled up the sleeves. It was also half tucked in, and this black scarf finished it off. I wore my Levi's today. They're dark wash. And I had my watch and these gold cone/stud earrings in. Oh and I have Sally Hansen Quick Dry nail polish on in Blue By!

Okay so quick and to the point right? I hope you guys do this and succeed! Bye, muah! XOXO


Sunday, February 10, 2013

OOTD: Rainy Day Brunch

Hi my goodie gumdrops! So today will be another outfit of the day and I went to brunch and then a study date with my friend. So let's see!
I wore a blue romper from Forever 21 that I love! It was warmer today but still rainy, so I paired it with some sheer black tights under. I tucked the tights into my DIY Galaxy Vans which I will link, and tossed on a gray cardigan because it was a little cold. So now to my accessories: I wore these pearl earrings (yes, they're real, in case you're wondering.) and a long owl necklace from Forever 21 from my friend Sarah (Love you bish.) and a rose gold watch. It's not Michael Kors (still saving up!) but my mother gave it to me so it's nice. I also painted my nails for Valentine's Day, the pink is Sally's Love Rocks and the champagne is Essie's Buy Me a Cameo. I also wore my orange Nine West crossbody just to add some color. Okie so that's my ootd and I hope you all have a great day! Bye, muah XOXO


Sunday, December 30, 2012

DIY QUOTE SCARF: as seen on Pinterest and also by We Are Owls

Hi my wonderful little halcyons, today I'm DIYing it out for you guys by showing how to make this quote scarf. It's cute and adds originality to a basic closet staple. P.S. It makes a really good gift for all those book worms out there; just pick a quote from a favorite book and you're good to go!

Okay what'll you need:
1. A scarf (well duh. I got mine for like $5.)
2. Fabric markers (I used the Stained by Sharpie kind. Around $7 for four.)
3. Some sort of surface to work on as well as something to put under the scarf so the marker doesn't bleed through.
4. An iron

Let's go to work!
So first you should pick a quote to write on the scarf and scarves are quite large or small depending on what you buy so keep that in mind. I chose one from The Book Thief because this is a gift for someone (PROCRASTINATOR ALERT!) It's "He was the one who painted himself black and defeated the world. She was the book thief without the words. Trust me, though, the words were on their way and when they arrived, Liesel would hold them in her hands like the clouds, and she would wring them out like rain."
Alright so get out your fabric markers, and test them with a few words just in case. I did like the Stained by Sharpie ones if you need some. Put the scarf on the surface and start writing! It may take a few tries for it to be truly dark. After you're done, wait for it to dry and then iron on low to set the ink. And voila, done!
Have fun looking chic and warm this winter! Happy New Year!